

The Coral Charm Peony is one of those flowers that evokes excitement in all flower lovers each time it is in season. It is particularly popular for weddings here in the U.K. If you are attending a wedding from late Spring to early Summer, the Coral Charm will very likely make an appearance. So what makes it so popular? Well, it’s definitely a showstopper! With its full appearance of semi-double flowers and it’s incredible colour changing transformation. Starting with vibrant coral through pinker tones and fading out to a creamier finish. Having attempted to make this particular variety for years out of sugar, I have finally created an easy version that I am happy with. So I am excited to now share with you my Coral Charm Peony Sugar Flower Tutorial.

As there are quite a few elements to this flower, I have created step-by-step videos for each stage of the process in the same way that I do for my paid classes in the Online School. However, this class is completely free! All of the videos can be found in order below but you can also reference them as a playlist on my YouTube channel here. I have also provided a list of tools as well as downloadable templates which can be found in my Shop here.
Want more peony tutorials? Then check out my Claire de Lune Peony Class here!
Tools
Peony petal veiner – https://tidd.ly/3xqxbUa
Dresden tool – https://amzn.to/3S2z6Xj
Soup spoons – https://amzn.to/3f8zQLC
Paintbrushes – https://ebay.us/cqCn1V
Wire cutters – https://amzn.to/38RNno9
Pliers – https://amzn.to/3GPycIG
Veining board – https://amzn.to/3MlfYQx
Small fine embroidery scissors – https://amzn.to/3asEp1h
Metal ball tool – https://amzn.to/43tQPfQ
Celpad / Foam Flower pad – https://amzn.to/3R0DQv4
Polystyrene Balls, 60mm – https://ebay.us/quqGkX
Materials
Gumpaste / Flower Paste – I always use homemade paste – you can find my recipe here
Gel colours – I have used Sugarflair Claret, Living Coral and Spruce Green – https://amzn.to/3qRIzVk
Dust Colours – I have used Rolkem New Alpine Rose, Roxy & Rich Peach Blush, Squires Kitchen Berberis, Light Green, Squires Kitchen Antique White
High Proof Alcohol – Culpitt Dipping Solution – https://amzn.to/3Sn5qUe
Yellow stamen – Sugar Lane – https://sugarinuk.com/sugar-lane-no4-yellow-long-head-stamens-for-sugar-flowers-113-p.asp
White and green floral tape – white https://amzn.to/3BAbEcQ green https://amzn.to/3f83Zut
Wires – 18 gauge, 24 gauge, 28 gauge
Egg white
White vegetable fat
Coral Charm Peony Templates – available as a downloadable PDF here
An Introduction to the Class
Making the Pistil
In this video, we begin by making the pistil which will form the centre of your peony.

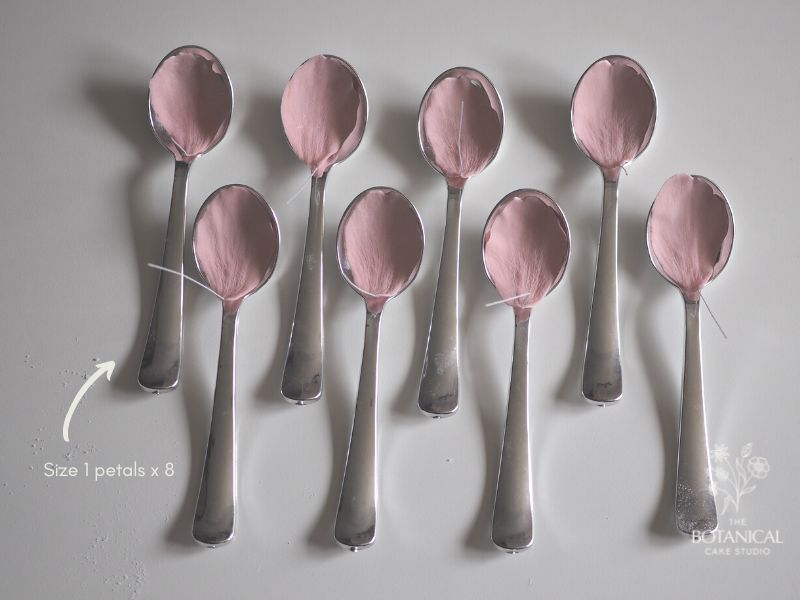
Size 1 Petals
The Size 1 petals are the smallest size and will form the first petal layers closest to the centre of your peony. You will need 8 petals of this size.
Size 2 Petals
The Size 2 petals are the medium size and will form the second petal layers of your peony. You will need 10 petals of this size.

Size 3 Petals
The Size 3 petals are the largest size and will form the final outer petal layers of your peony. You will need 10 petals of this size.

Dusting the Pistil and Stamen
In this video I will show you how to dust and colour your pistil as well as adding and colouring your stamen for a lifelike finish.
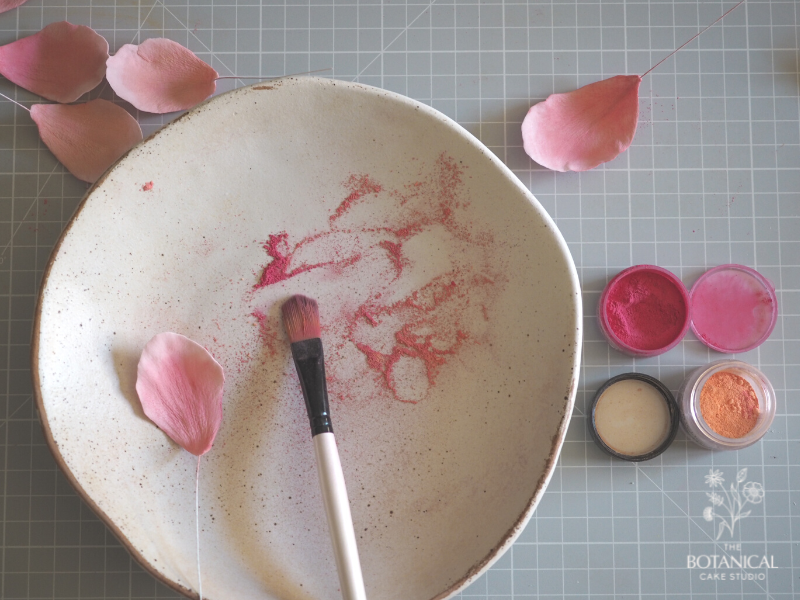
Dusting the Petals
In this video I will show you how to dust each of your petals to give a vibrant coral colour to your peony. If you wanted to create a more faded appearance to your peony then you can adjust the shade of the dust colours. For a very faded appearance, I recommend colouring your paste to a pale pink and leaving the petals un-dusted or with some very subtle hints of colour. For inspiration of different shades when the peony is in various stages of bloom, check out my Pinterest board here.
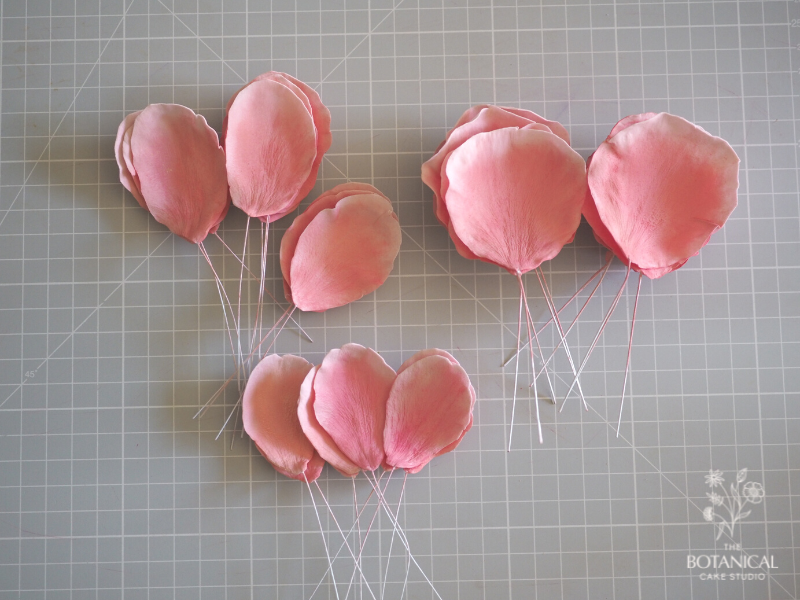
Assembling Your Peony
In this video I will show you how to assemble your Coral Charm Peony sugar flower. You will need to carefully tape each of the petals in position. There isn’t a set order to this so take note of the way I am grouping my petals in the video. I also recommend taking a look at pictures of Coral Charm Peonies in order to see the petal structure. It is always useful referencing photos as guidance and I have created a Pinterest board for the class here.

Making the Calyx
In this video I will show you how to make the calyx to complete your Coral Charm Peony sugar flower. If you want to be able to manipulate your petals then you can create a wired calyx with individually wired sepals. However, I prefer to create a calyx using my 2 templates once my petals are in position. It is a much quicker method and looks very effective.
I hope you have enjoyed my Gumpaste Coral Charm Peony Sugar Flower tutorial! If you have any questions, do leave them in the comments below or on the videos on YouTube. Don’t forget, you can get your downloadable templates for the class here. As always, I LOVE seeing your creations so please tag me @thebotanicalcakestudio on instagram to have your work featured in my Student highlights.
Want more peony tutorials? Then check out my Claire de Lune Peony Class here!
Affiliate Disclaimer
The Botanical Cake Studio provides many free resources for all to enjoy and learn from. I (Clare from The Botanical Cake Studio) only recommend products that I genuinely use and love and that I have paid for myself. If something has been offered to me for free, I will disclose this clearly. Some links provided may contain affiliate links which will mean that The Botanical Cake Studio may receive a small commission (at no extra cost to you) if you choose to purchase an item using the link. Small commissions such as these can help The Botanical Cake Studio provide more fabulous free content for you so huge thanks if you decide to make a purchase through one of the links.
This blog shares my opinion based on my own experience in making sugar flowers and wedding cakes. From time-to-time, I will also share recommendations, polls and insights from my own students and Facebook group members as an attempt to offer some balance to the blog. Thank you for your continued support.
Clare x
Can’t wait to try this. Thank you so much for sharing your expertise.
You’re welcome Cindy! Do share some pics of your peonies if you try them as I’d love to see them!
I just made the most beautiful Peony with your help! Thank you so much. Your step by step guide was so helpful. I will likely look to purchase other courses.
Oh I’m so glad it was helpful for you Debbie! Thanks for sharing your beautiful peony with me on Facebook. It’s always lovely to see the finished flowers. Looking forward to seeing what you create next 🙂
Looking forward to taking this class. Thank you for sharing
You’re welcome Julia. I hope you enjoy following the class. I would love to see pics of your finished flowers so please do share them 🙂
Thank you for such a detailed instructions.
You’re welcome Jasvindar!
Definitely I will try this beautiful flower.i always used to follow your Chanel.thank you very much for sharing your talents.❤️❤️
You’re welcome Shamini. I really hope you enjoy the tutorial and please do share pictures of your creations if you decide to give it a go 🙂
Looking forward to taking this class. Thank you for sharing
You’re welcome Glenda! Please do share some pics of your creations if you make them 🙂
This is so sweet of you to share this with us. I will be looking into the products to purchase. You have a heart of gold..
So glad you are enjoying the tutorial Dinah. Thanks so much for your lovely comment. If you have any questions, please never hesitate to ask <3
Clare x